
Your client area lets you check or change the NS/DNS servers of your domain registered with PulseHeberg in just a few clicks!
Accessing the list of your domains#
First, go to your PulseHeberg client area in the "My domains" section, or click on the following link to access the list of your domain names registered with PulseHeberg.
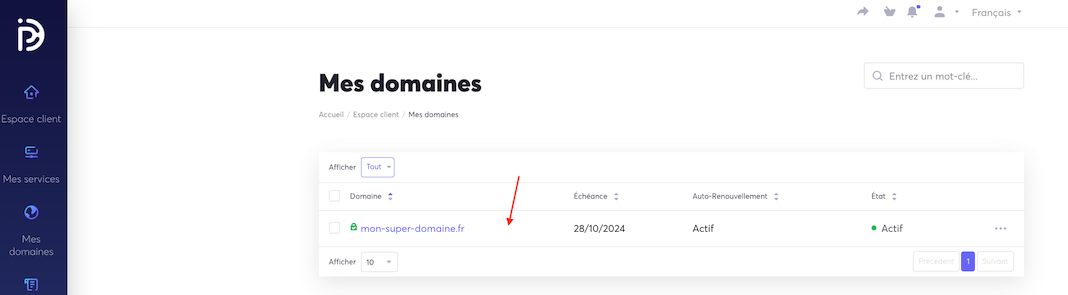
Once the list of your domains is displayed, simply click on the row of the domain you want to manage:
Domain management page#
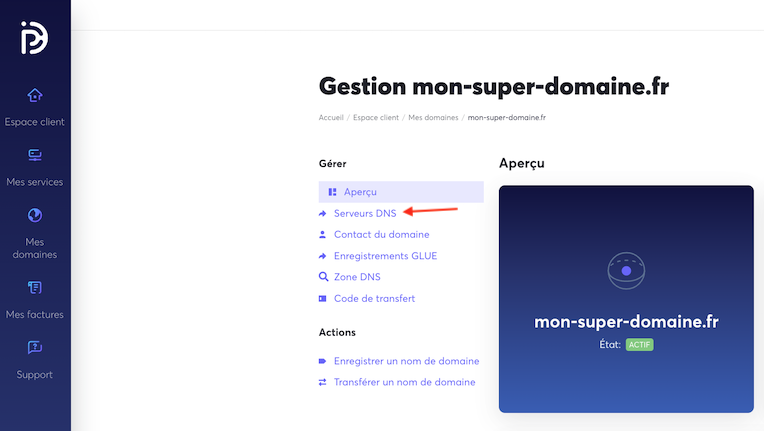
You will arrive on the management page of your domain. From this page you can manage all the administrative aspects of your domain (changing NS servers, managing automatic renewal, modifying contacts, etc).
In the side menu, click on the "DNS Servers" option:
Managing NS/DNS servers#
The tab that opens lets you manage the NS/DNS servers of your domain. These are the servers that host the DNS zone (A records, CNAME records, etc) of your domain name.
PulseHeberg provides its customers with two different pairs of NS/DNS servers, depending on how you intend to use your domain:
A. You want to use your domain with a WEB Plesk plan (for example, the WEB-5, WEB-25, EDU-5 plans)#
In this case, you must use the following NS/DNS servers:
B. You want to use your domain with a VPS, or another server that is not with PulseHeberg#
In this case, you must use the following NS/DNS servers:
You can also use any other NS/DNS servers from another provider if you wish (for example CloudFlare)
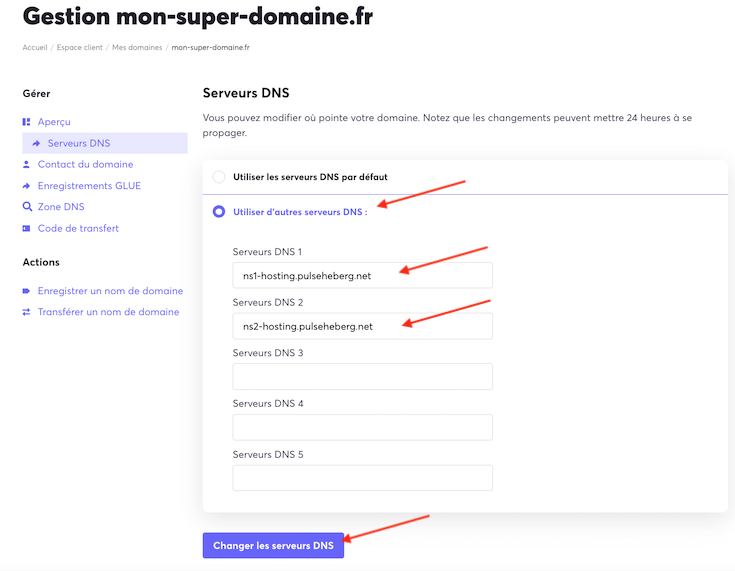
To change the NS/DNS servers of your domain, simply click on "Use other DNS servers", then enter the NS/DNS servers you want to use, and finally confirm at the bottom of the page.
That's all!#
Your new DNS/NS servers are now saved. However, please note that you will probably need to wait a few hours for DNS propagation before the new servers take effect.