
Would you like to add a new domain to your PulseHeberg Plesk WEB pack? The process is very simple and only takes a few clicks:
Check that the NS/DNS servers of your new domain are properly configured#
In order for Plesk to automatically configure the DNS zone of your domain, you must first make sure that your domain is configured to use the NS/DNS servers of our Plesk infrastructure, namely:
NS/DNS server No. 1: ns1-hosting.pulseheberg.net NS/DNS server No. 2: ns2-hosting.pulseheberg.net
If your domain is registered with PulseHeberg, you can view (and change) this setting directly from your PulseHeberg customer area. Feel free to check the following documentation on this topic: How to change the DNS servers of a domain?
If your domain is registered with another provider, we recommend contacting that provider's technical support so they can help you configure the NS/DNS servers of your domain.
Add the domain in the Plesk panel#
To add your new domain to your WEB hosting plan, first log in to your Plesk interface. If you are not sure how to log in to the Plesk interface, check out this article from our help center: Logging in to the Plesk panel
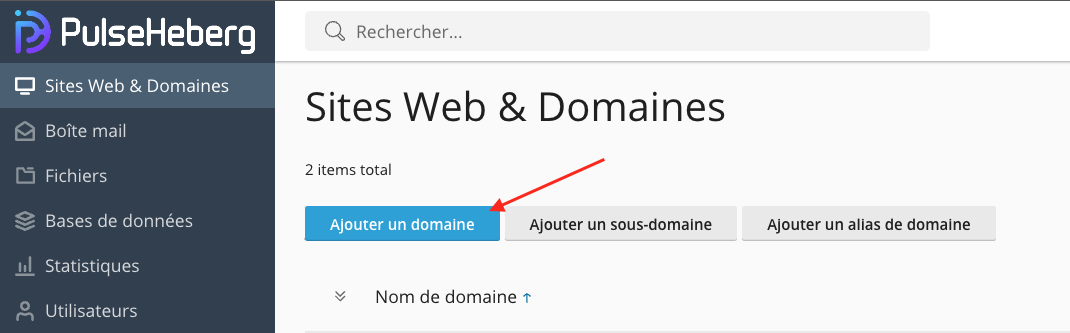
Once logged in, simply click on the "Add a domain" button as shown below:
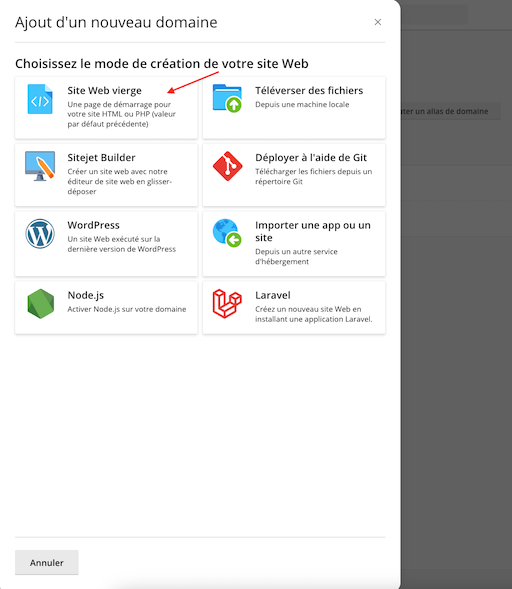
In the side panel that opens, choose the type of site you want to create for this new domain. In most cases the "Blank Website" option is the most suitable, but you can also choose other options such as NodeJS or Wordpress, depending on your needs.
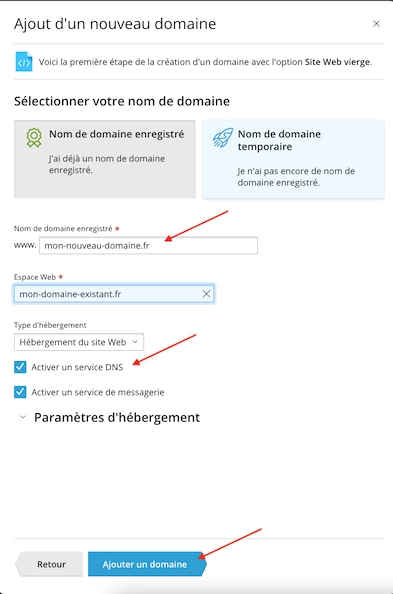
Finally, on the new page that opens, simply enter the name of your new domain. Make sure the "Activate a DNS service" box is checked, then confirm at the bottom of the window.
That's all!#
Once these steps are completed, your domain is added to your WEB plan. Note however that it may take a few hours for your domain to come online, due to the propagation time of the new DNS records. This delay can range from a few minutes to a few hours depending on your internet service provider.