
This guide explains how to configure your domain name to link it to your Collaborative Suite.
Step 1: Initial check#
Once your Collaborative Suite is activated, you can manage it from your PulseHeberg customer area. On your first access, a warning message may appear, indicating that your domain configuration is not yet complete.

This message means that your domain name does not yet point to the Collaborative Suite servers. To fix this, you need to configure the DNS zone of your domain.
Step 2: Retrieving the DNS information#
To get started, go to the My domain (Mon domaine) tab. This section displays the DNS settings required to configure your domain:
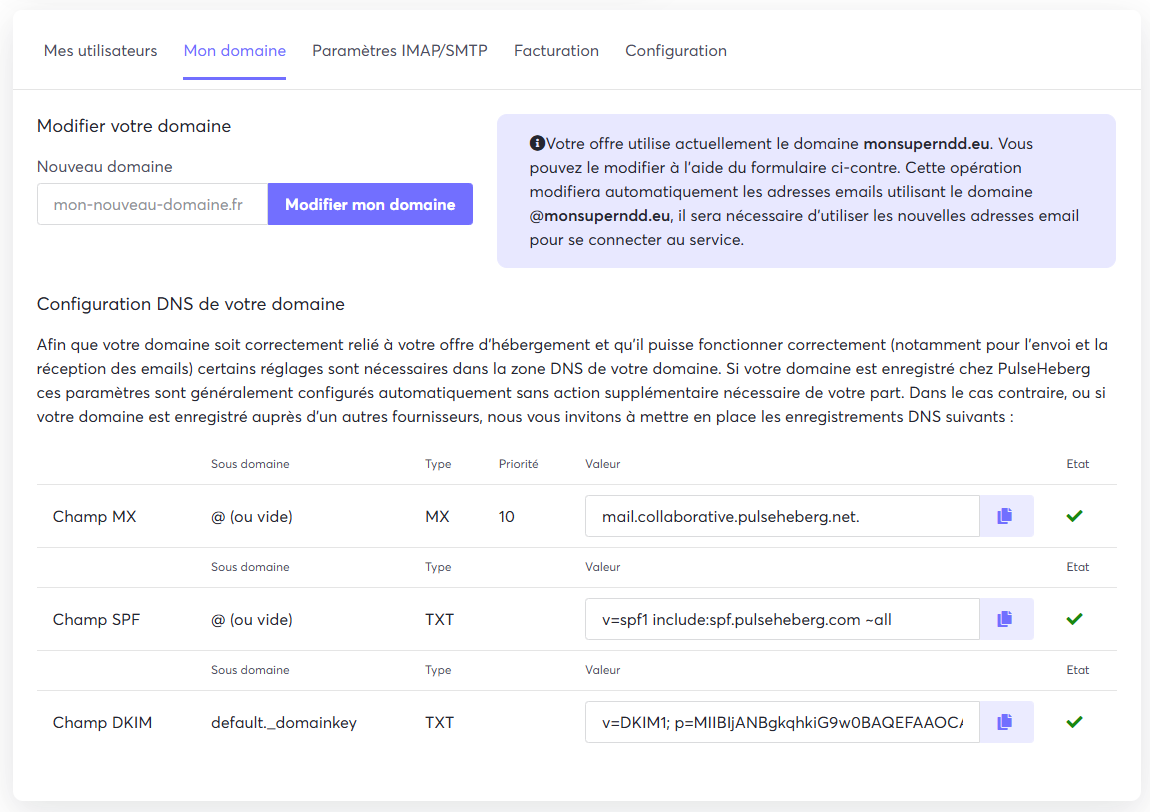
You will need to enter this information in the DNS zone of your domain name. If your domain is managed by PulseHeberg, follow the instructions below.
Step 3: Configuring the DNS zone (for domains with PulseHeberg)#
- In the side menu of your customer area, click on My domains (Mes domaines) to display the list of your domain names.
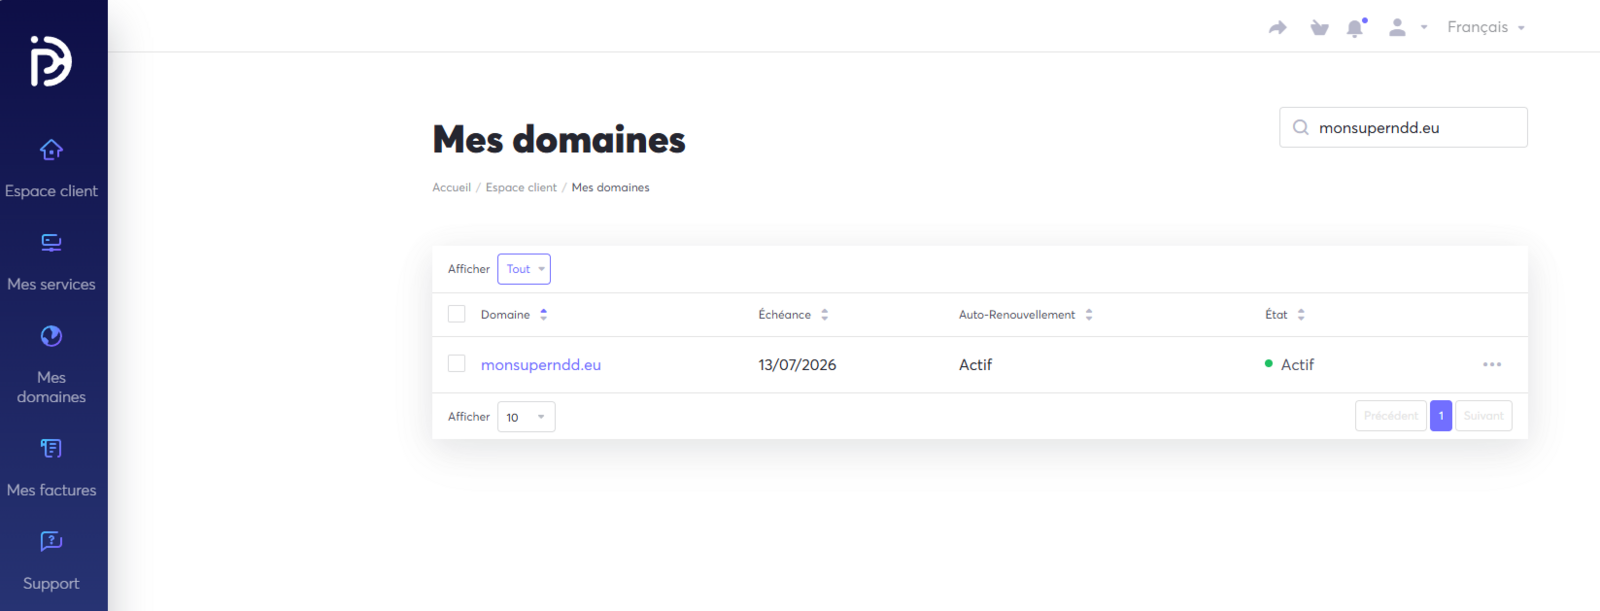
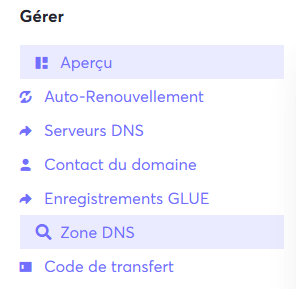
- Select the domain name you want to use for your Collaborative Suite (for example, monsuperndd.eu). On the domain management page, go to the DNS zone (Zone DNS) tab.
- You now need to add the DNS records (MX, SPF and DKIM) provided earlier in the My domain (Mon domaine) tab. Fill in the corresponding fields.
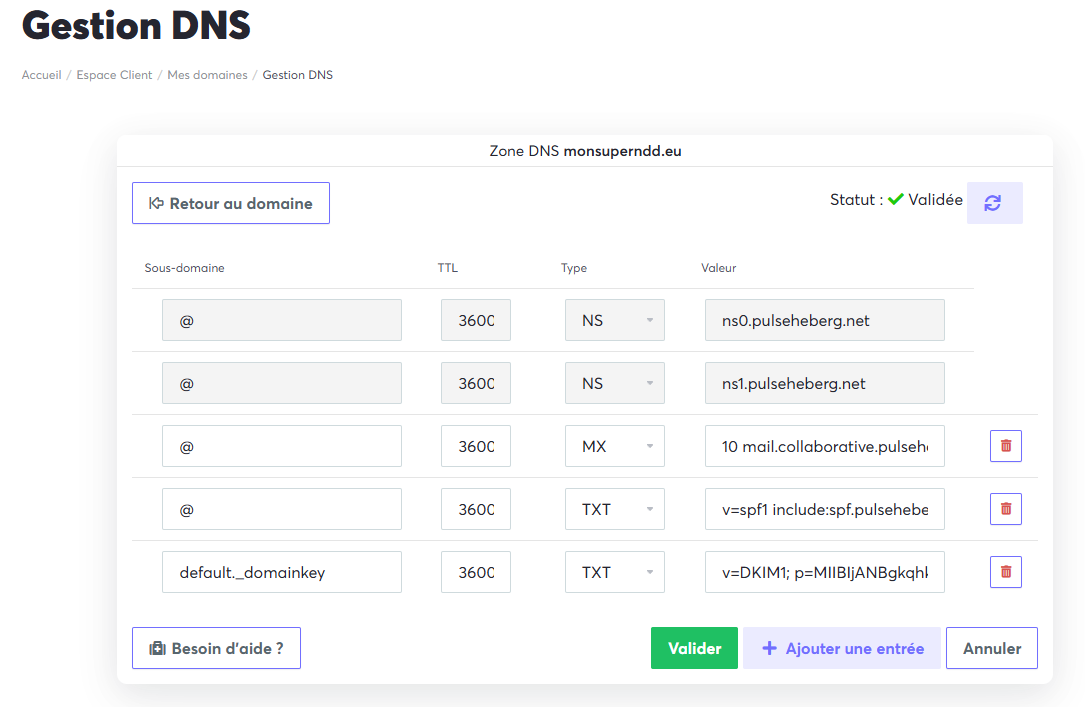
- Once you have entered the information, click the green Confirm (Valider) button. A confirmation message will appear to let you know that the new DNS zone has been saved.

Step 4: Finalizing#
After the DNS changes have propagated (which can take from a few minutes to several hours), go back to your Collaborative Suite management page. The warning message should have disappeared, and the Status (État) column will show a green checkmark icon, confirming that your domain is correctly configured.
Your Collaborative Suite is now ready to use!